In Kudzu Analytics, users can add new networks to monitor and analyze their LoRaWAN deployments. However, adding a network is subject to the user’s billing plan. If your plan does not allow adding networks, this option will be unavailable. Contact support or check your account settings to upgrade your plan if needed.
Steps to Add a New Network
Step 1: Access the Networks Page
- Navigate to the Networks section from the left-hand menu in Kudzu Analytics.
- You will see a list of existing networks if any are already configured.
Step 2: Open the “Create Network” Dialog
Click on the Create Network button located at the bottom right of the screen.
The “Create Network” dialog will appear, as shown below:
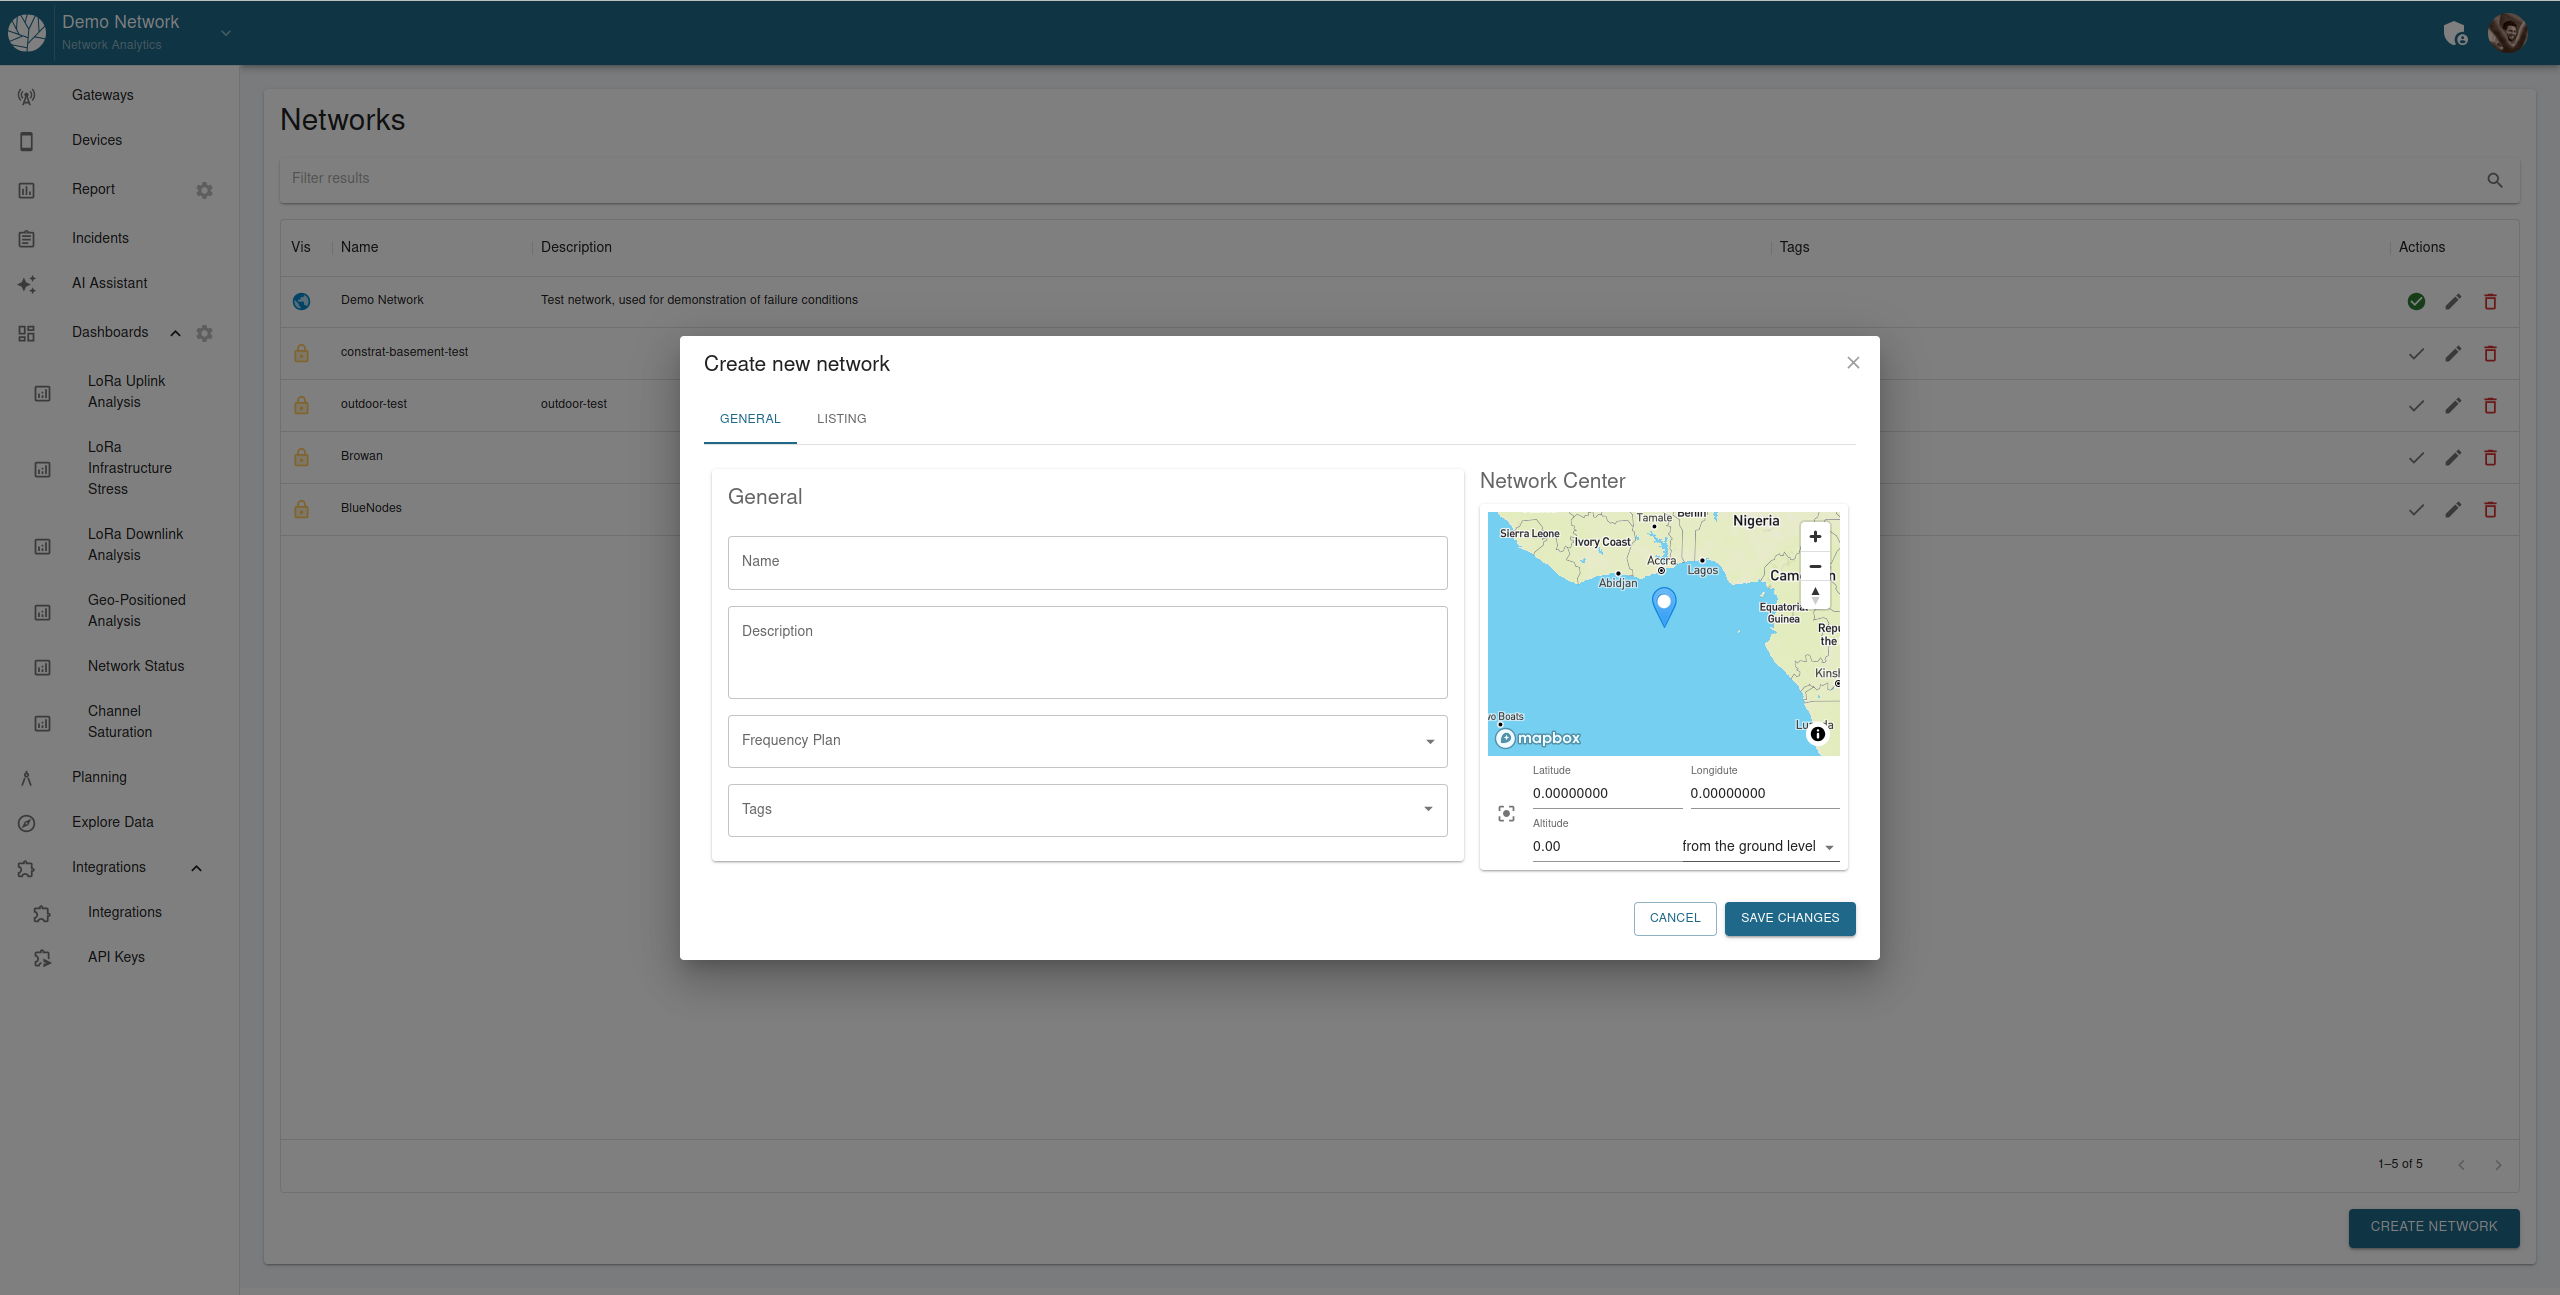
Step 3: Fill in General Information
- Name: Enter a name for your new network.
- Description: Provide a short description of the network’s purpose or location.
- Frequency Plan: Select the frequency plan applicable to your network (e.g., EU868, US915).
- Tags: Add tags to categorize or label your network for easier identification.
Step 4: Configure Network Center
- Map Interaction: Use the interactive map to set the central location of your network.
- Drag the marker to the desired position.
- Alternatively, enter the latitude, longitude, and altitude manually.
- Specify the altitude if the network center is at a significant elevation, such as in hilly regions or tall buildings.
Step 5: Save Changes
- Once all details are entered, click on the Save Changes button.
- The new network will be added to your account and listed on the Networks page.
Additional Notes
- Billing Plan Restriction: Ensure your billing plan allows adding new networks. If the option is unavailable, contact support or upgrade your plan.
- Editing Networks: Once created, you can edit the network details by clicking the pencil icon next to the network name.
- Deleting Networks: Networks can be deleted using the trash icon, but this action is irreversible.
By adding networks, users can organize and monitor multiple LoRaWAN deployments efficiently, ensuring seamless data analysis and network management.