The “Add Gateway” interface in the Kudzu Analytics platform allows users to create and configure new gateways step by step. This section provides a detailed guide on using the interface to set up a gateway.
Steps to Add a Gateway
Step 1: General Configuration
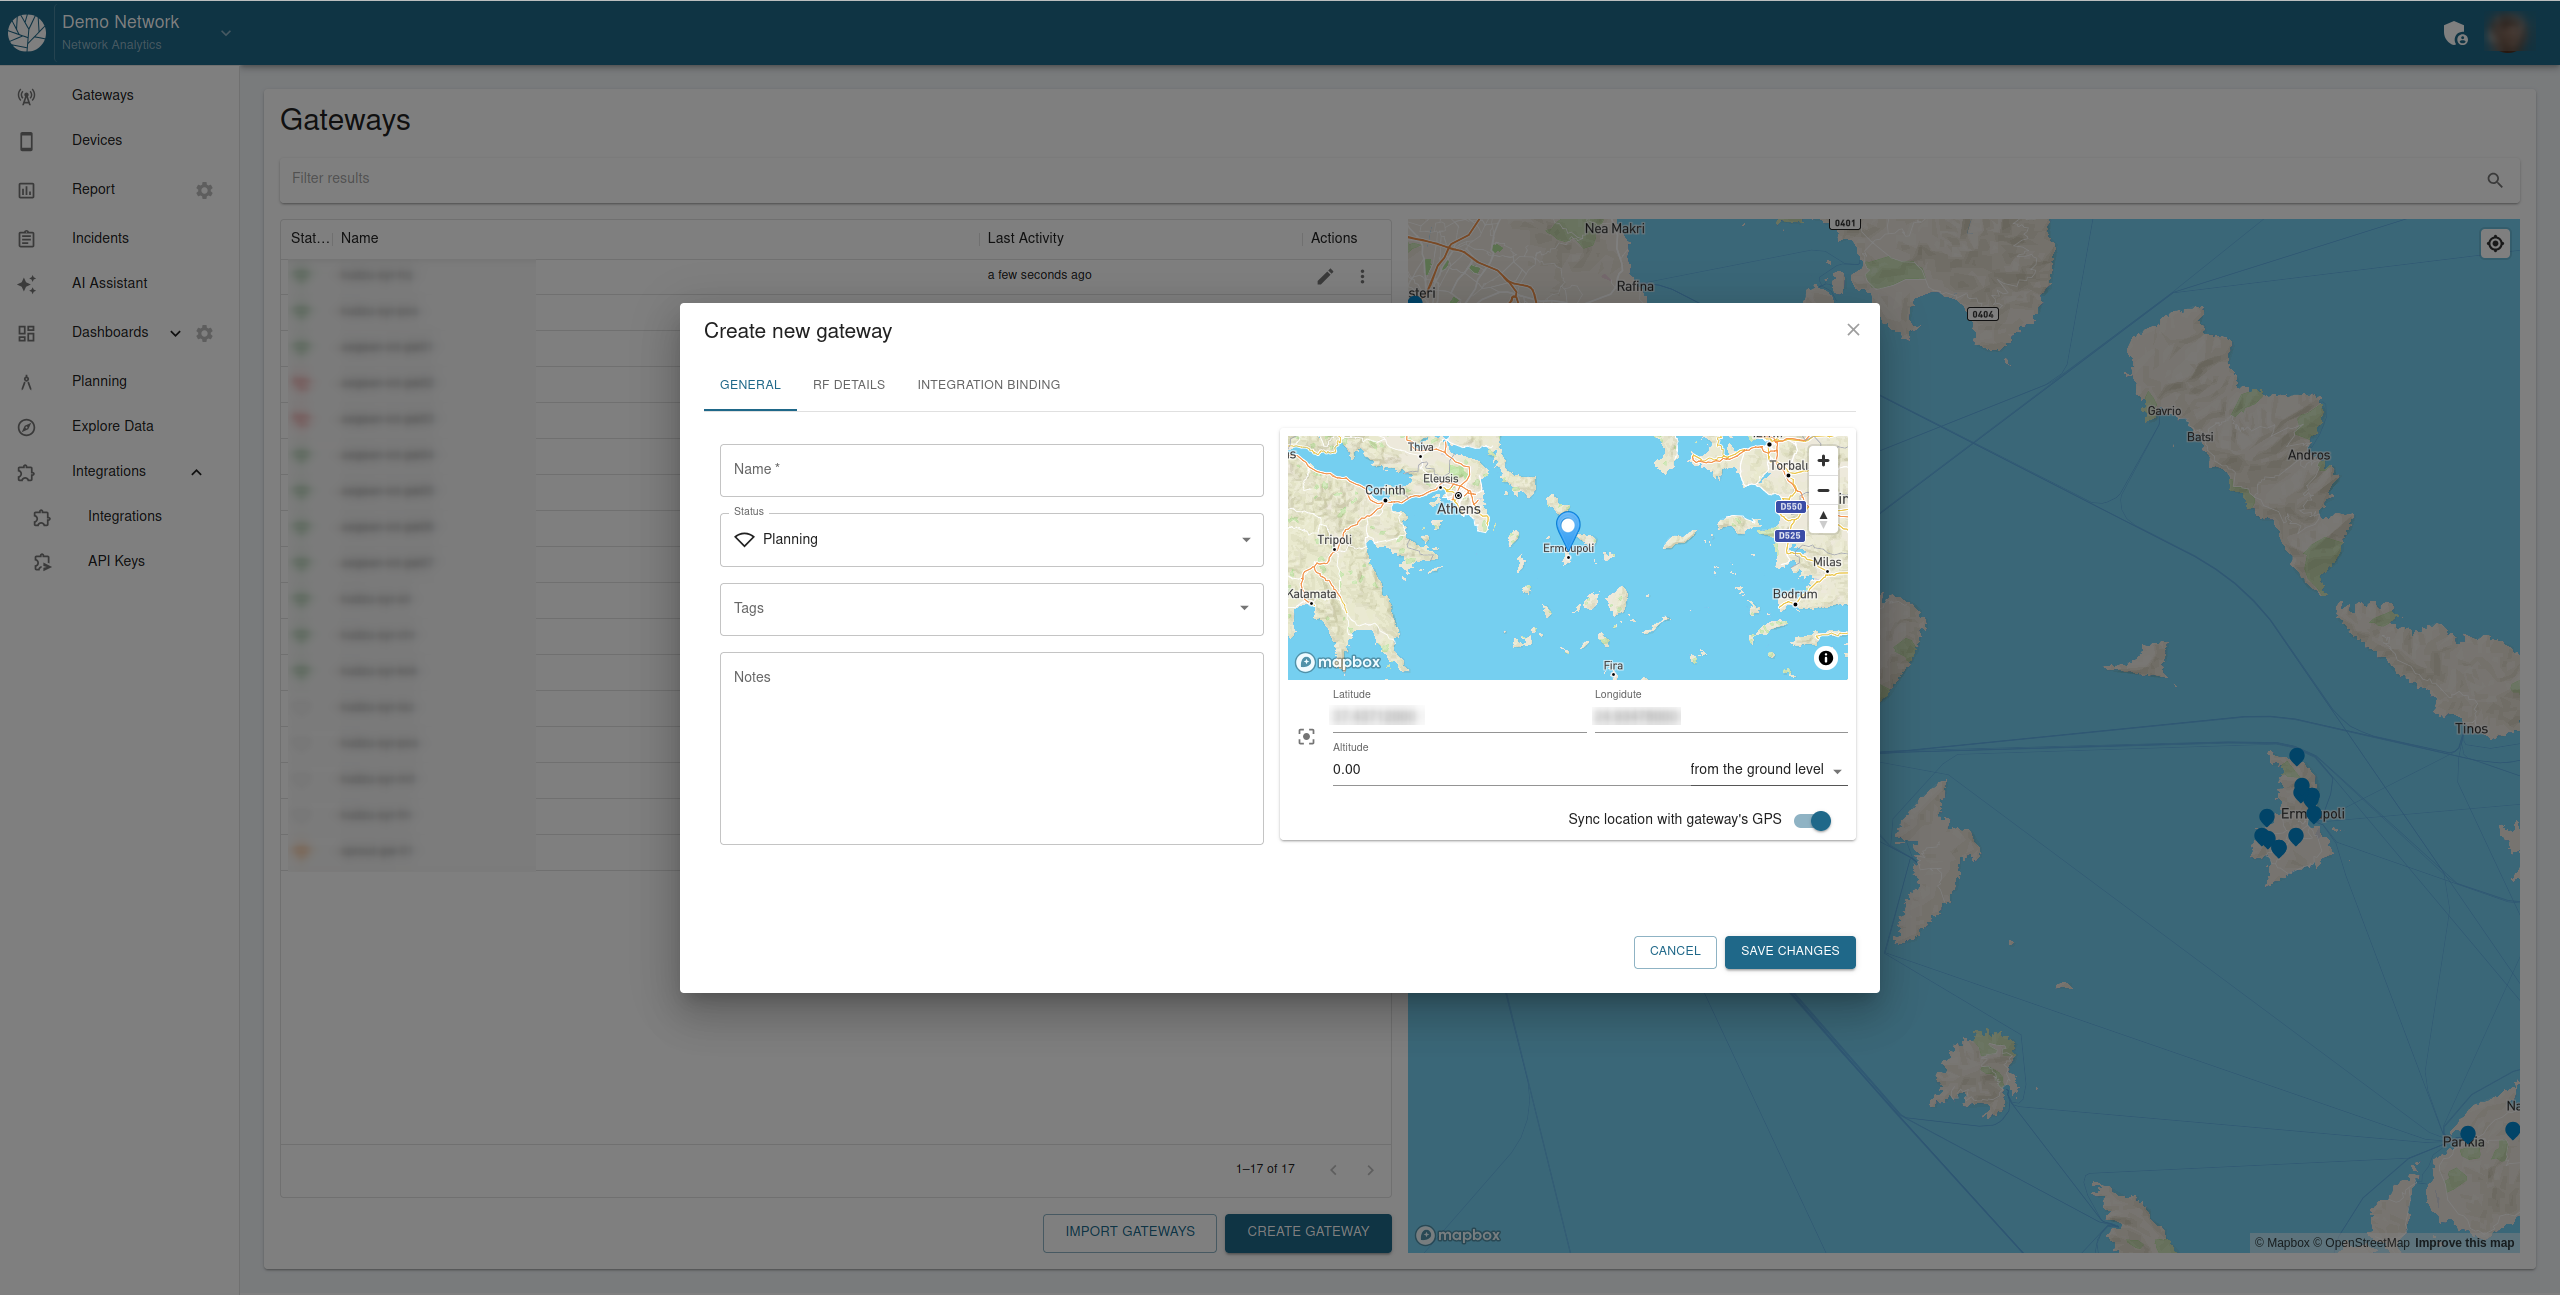
Navigate to the “General” tab (as shown in the screenshot above).
Fill out the following fields:
- Name: Enter a unique name for the gateway (this is a required field).
- Status: Select the operational status of the gateway from the dropdown menu. Options include:
- Planning: For gateways in the design or pre-deployment phase.
- Tags: Optionally, add keywords or identifiers to organize and classify the gateway.
- Notes: Provide additional details or comments about the gateway, such as installation specifics or planned deployment dates.
Configure the gateway’s location using the map:
- Adjust the Latitude and Longitude values manually or by dragging the marker on the map.
- Specify the Altitude (in meters) of the gateway relative to ground level.
- Use the Sync Location with Gateway’s GPS toggle to automatically synchronize the gateway’s location with its GPS data if available.
Verify the information and proceed to the next step by clicking “Save Changes” or navigating to the RF Details tab.
Step 2: Configure RF Details
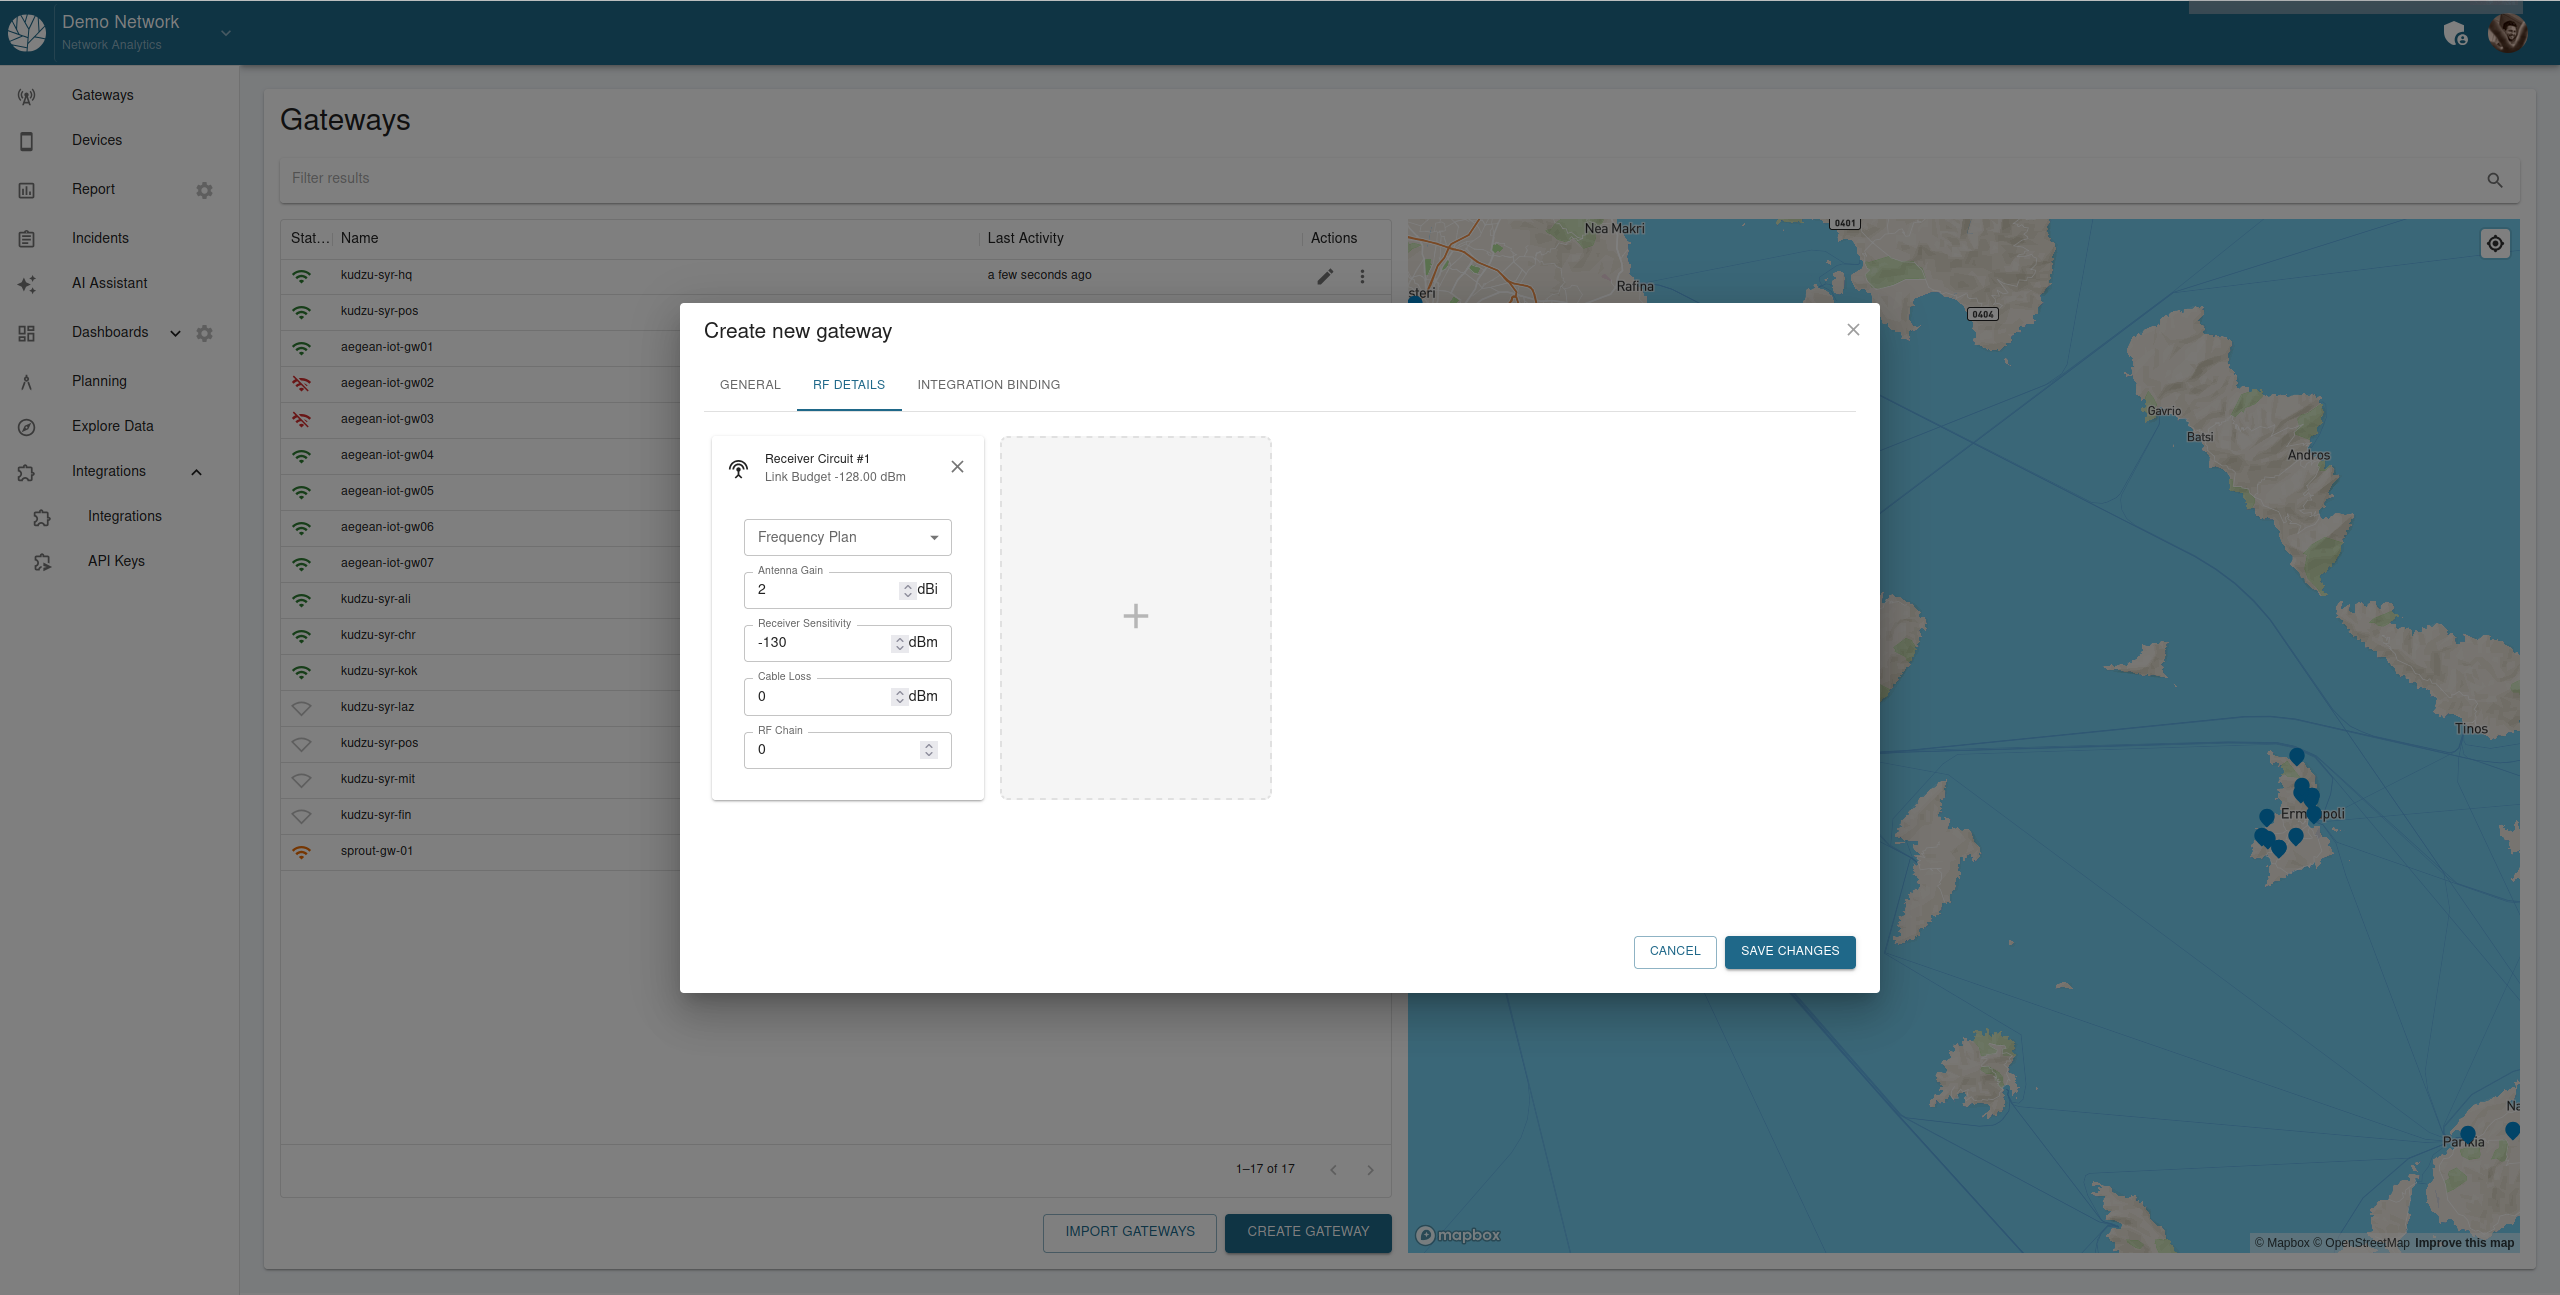
Switch to the “RF Details” tab (as shown in the screenshot above).
Configure the receiver circuit details:
- Frequency Plan: Select a frequency plan from the dropdown menu.
- Antenna Gain: Enter the gain of the antenna in decibels (dBi).
- Receiver Sensitivity: Input the sensitivity of the receiver in decibels-milliwatts (dBm).
- Cable Loss: Define the expected signal loss due to cabling (in dBm).
- RF Chain: Assign the RF chain number.
Observe the Link Budget displayed at the top of the Receiver Circuit configuration. This value is automatically calculated based on the provided RF parameters.
Add more receiver circuits (if required) by clicking the “+” button within the configuration panel.
Verify all RF details and proceed to the next step.
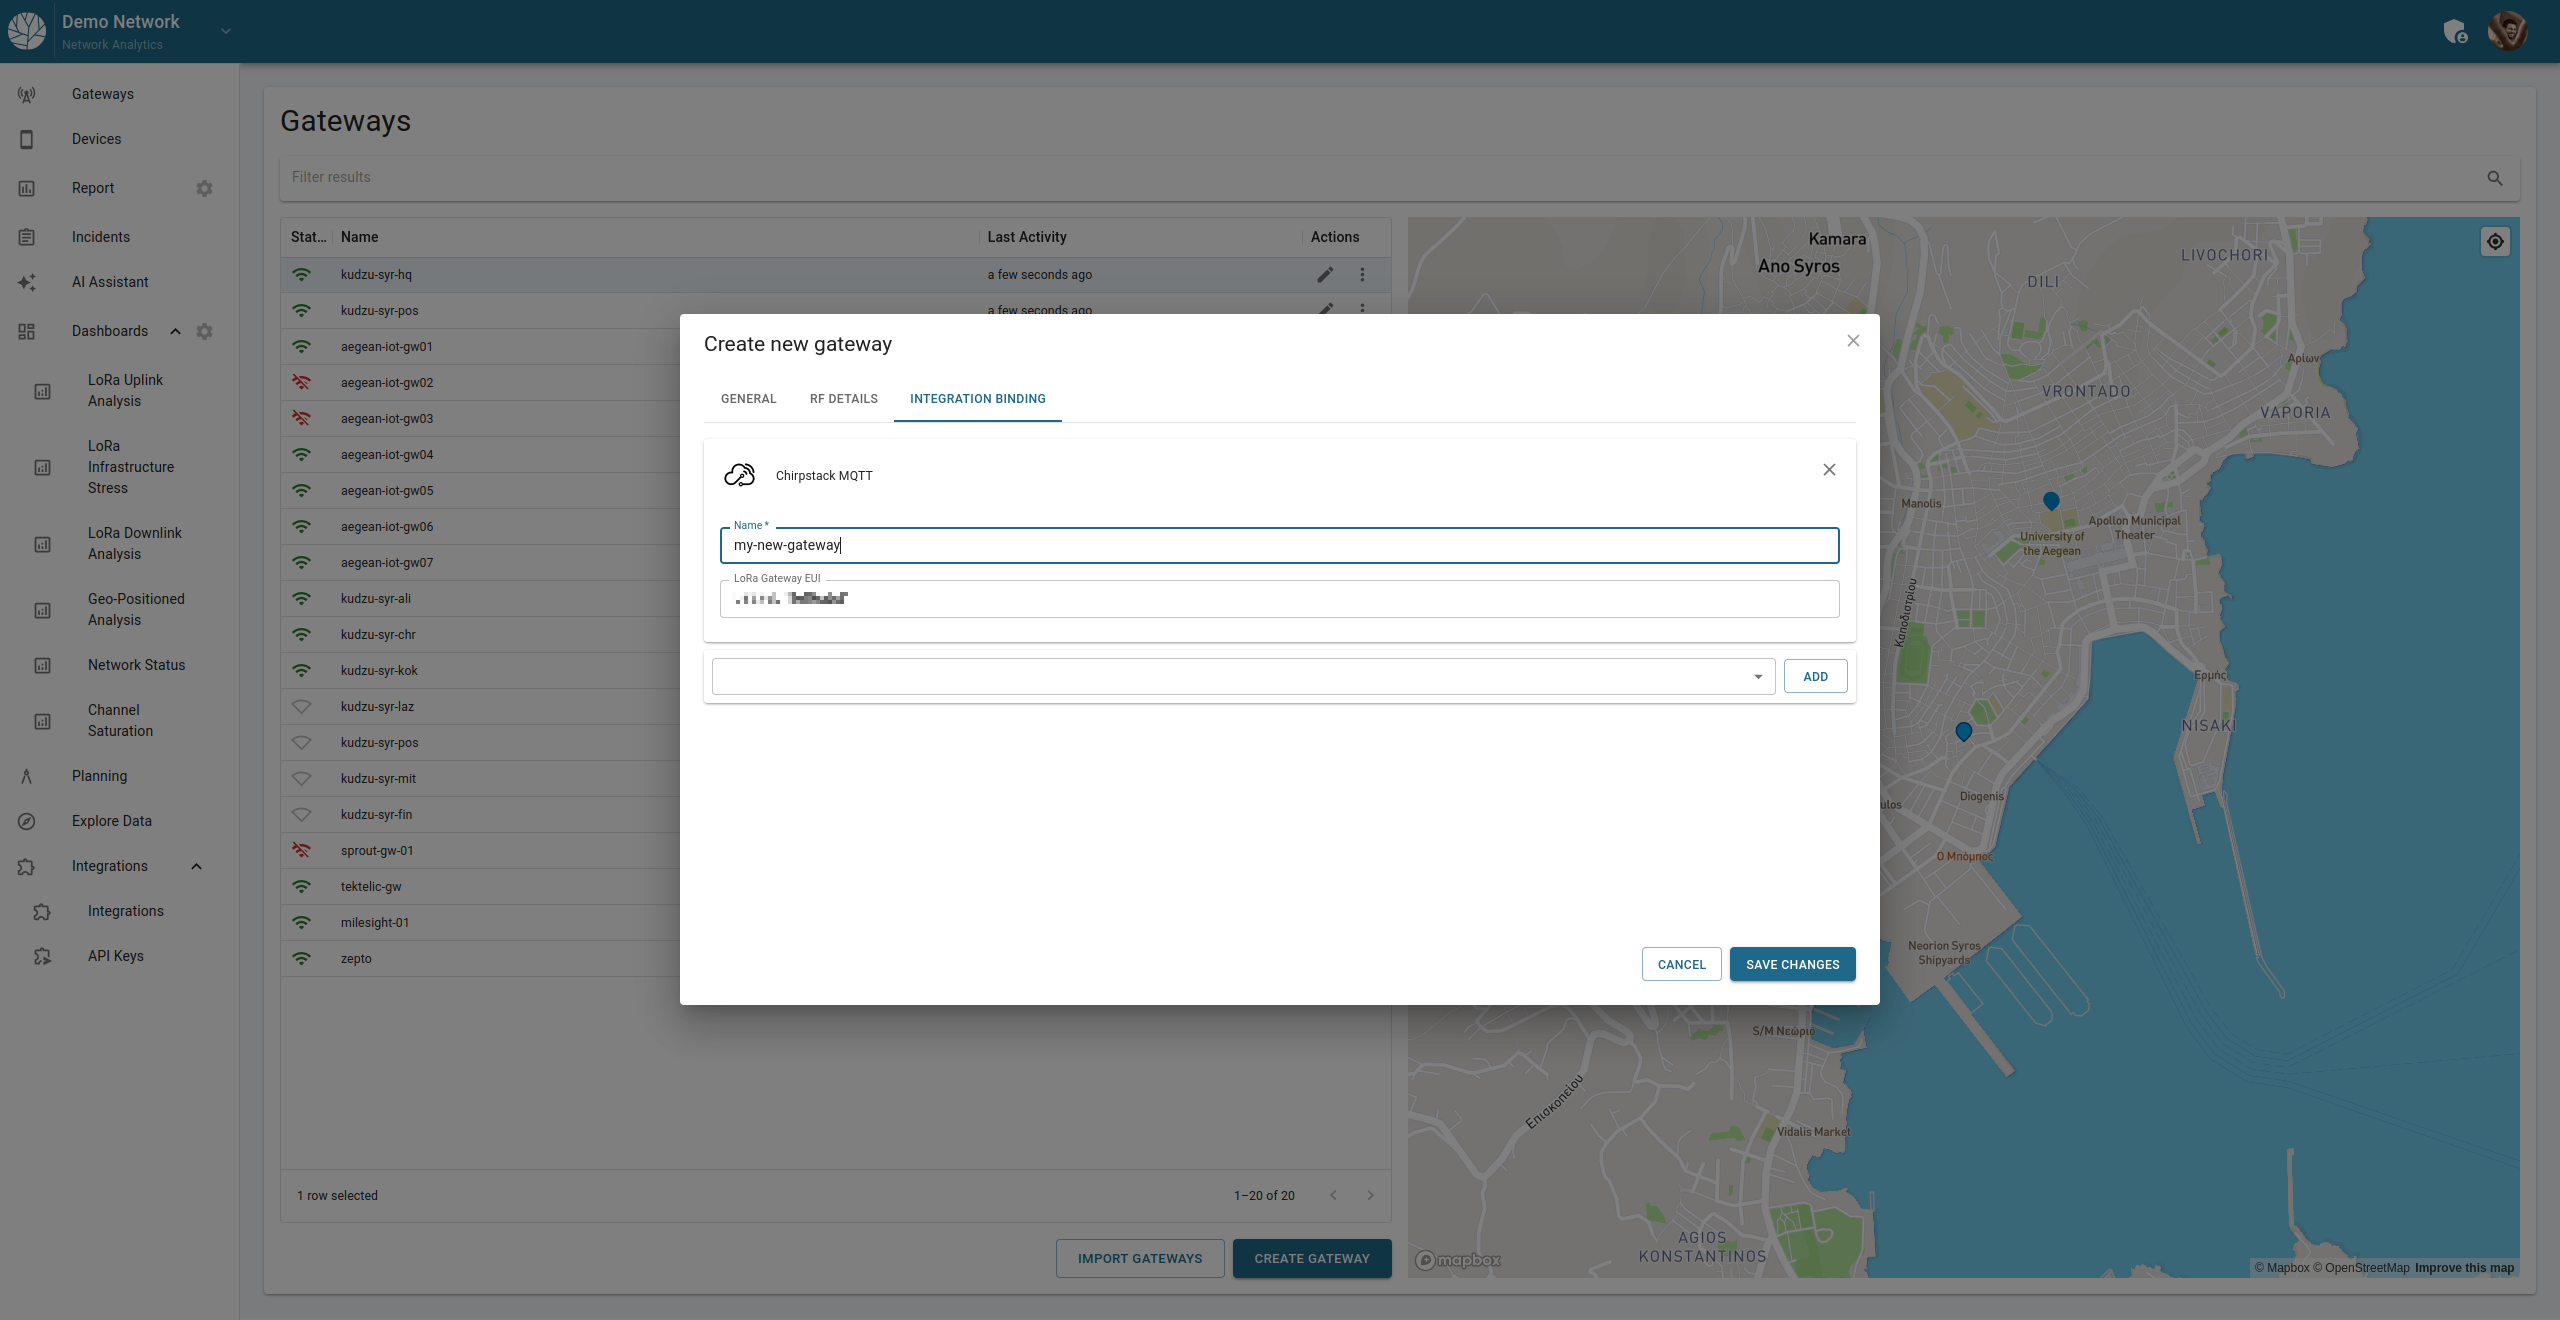
Step 3: Set Up Integration Binding
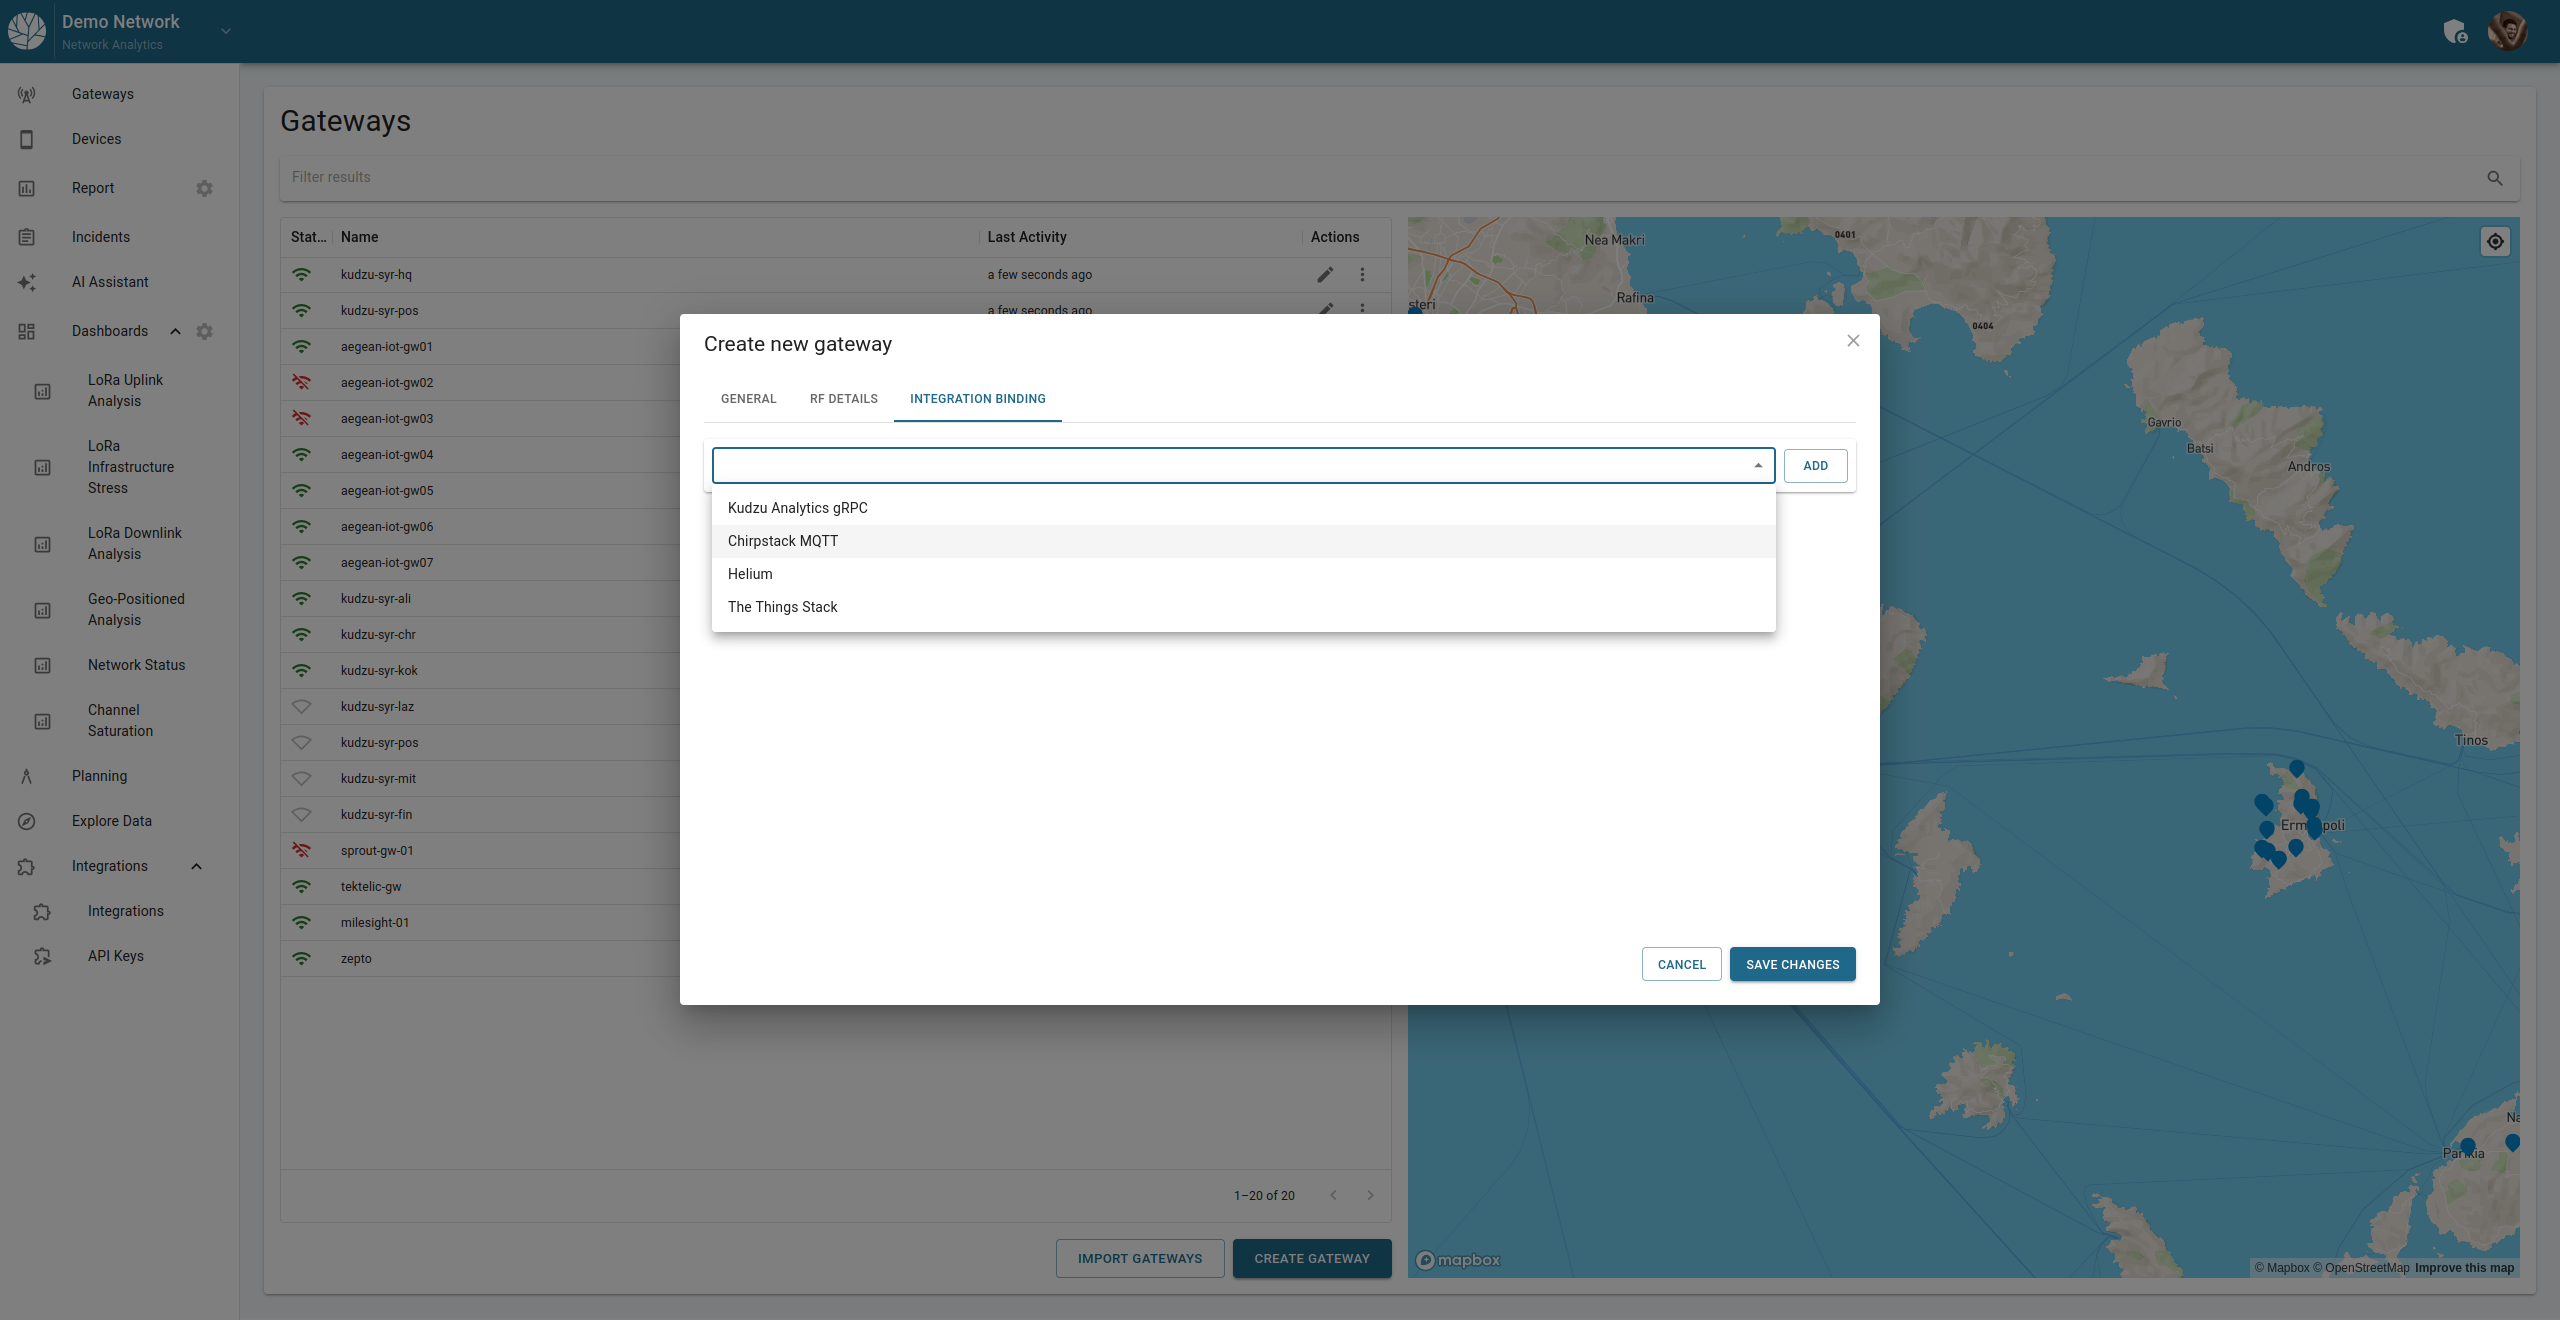
Integration binding links your gateway in Kudzu Analytics to an external service. This step is critical to ensure seamless data flow between the gateway and your chosen integration interface. Follow the instructions below to set up the integration binding.
- Navigate to the “Integration Binding” tab (as shown in the screenshot above).
- Choose the integration interface you are using. The steps will slightly differ based on the selected interface. Refer to the instructions below for your specific integration:
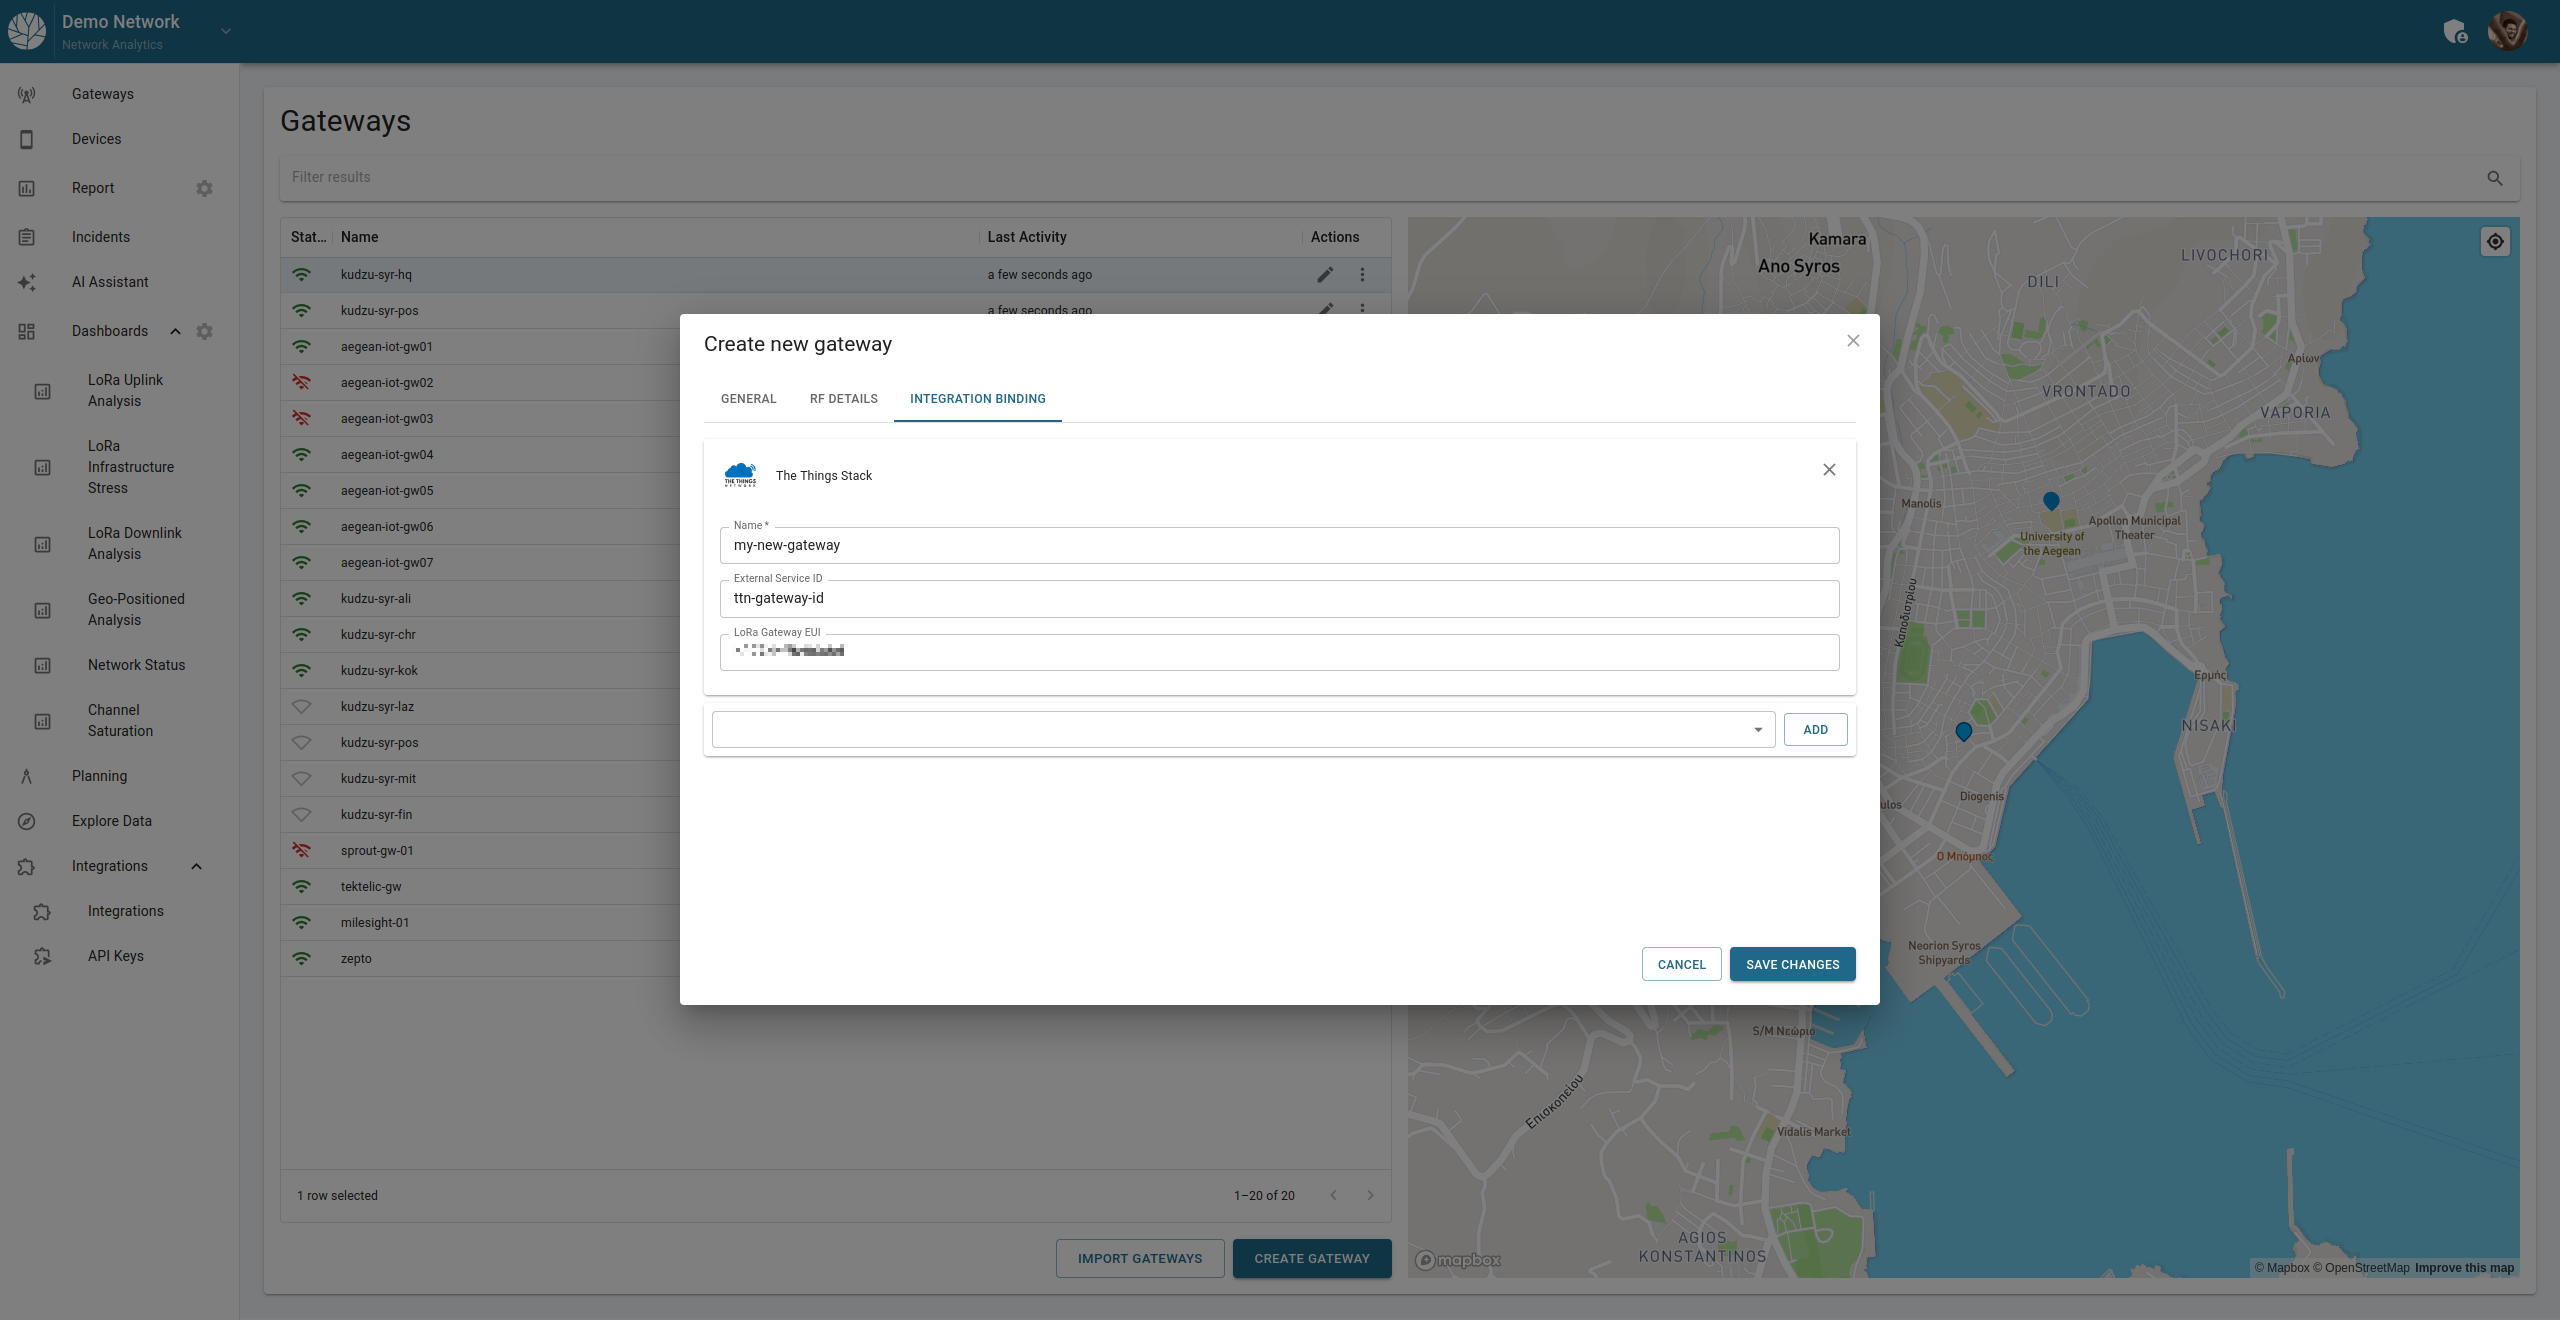
The Things Network (TTN)
Fill in the Name field.
Enter the External Service ID matching the ID from TTN.
The External Service ID field must match the ID assigned to the gateway in TTN. The Name field can be any alias for internal use in Kudzu Analytics.Complete other fields as required.
Click Save to finalize the integration.
Example of a completed TTN integration:
ChirpStack
For ChirpStack integration, the External Service ID is optional.
Fill in the Name field.
Provide the External Service ID (optional).
Complete any additional fields specific to ChirpStack.
Click Save to finalize the integration.
Example of a completed ChirpStack integration:
Step 4: Save and Finalize
- After completing all configurations, review the details across the three tabs.
- Click Save Changes to store the gateway configuration.
- If you wish to discard changes at any step, click Cancel to exit the interface without saving.
Additional Notes
- Ensure you have access to the correct gateway ID and settings in your chosen interface.
- Once the integration binding is saved, data will start flowing between the gateway and Kudzu Analytics.
- Refer to the documentation of your selected integration interface if you encounter any issues or need further assistance.